Nutanix and Gitlab – vSphere Cluster creation and AOS configuration
In the previous blog post, we showed you how Gitlab and Nutanix Foundation APIs could be leveraged to create a Nutanix AHV cluster from scratch: https://vinception.fr/nutanix-and-gitlab-foundation-and-cluster-creation/ In this post, we are going to use the same components, method and process to:
- Create a Nutanix Cluster with vSphere as the Hypervisor
- Configure the Nutanix Cluster (AOS settings): Accept Eula, Configure Pulse, DNS, NTP, LCM, Http Proxy, Timezone, SNMP, SMTP, Containers, Syslog, Licensing, Active Directory, Role Mappings
We still have our Gitlab Project called ntnx-automation.

We edit the ntnx-cluster-config.json file and fill all settings related to our new Nutanix vSphere deployment.
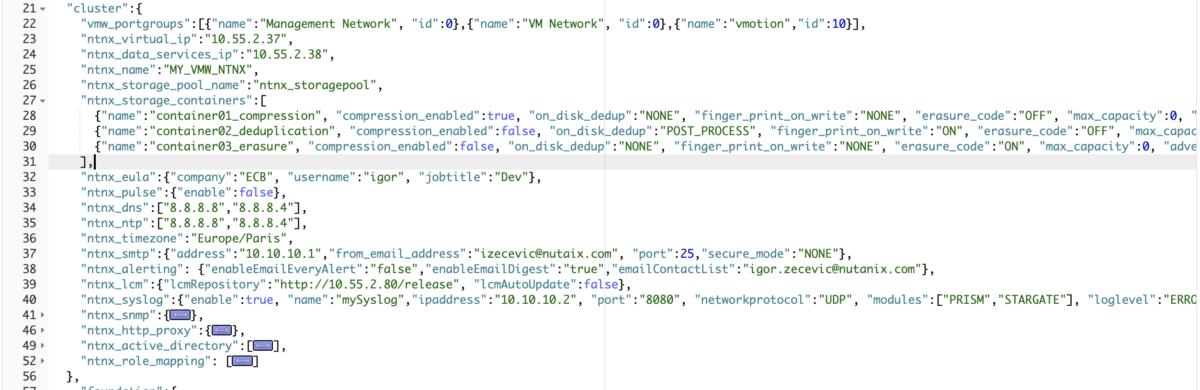
If we take a look at the cluster bracket (line 21 to 52), we essentially declare all parameters that will be applied to the Nutanix cluster.
For example, ntnx_storage_containers (line 27), describes that the cluster will have 3 containers: 1x with compression, 1x with deduplication, and 1x with erasure_coding enabled.
Additionally, the cluster bracket has all standard settings such as NTP, DNS, Timezone, Eula, Pulse, LCM, etc ..
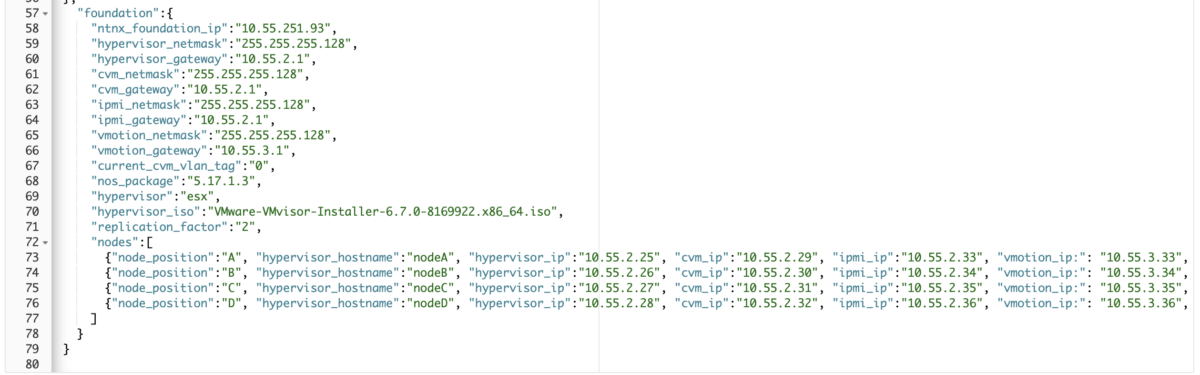
The foundation bracket is used to store all parameters required for the Foundation process (nodes imaging). If we take a closer look, our cluster will be composed of 4 nodes, the hypervisor will be vSphere (esx), and the version will be VMware-VMivsor-Installer-6.7.0-8169922.x86_64.iso.
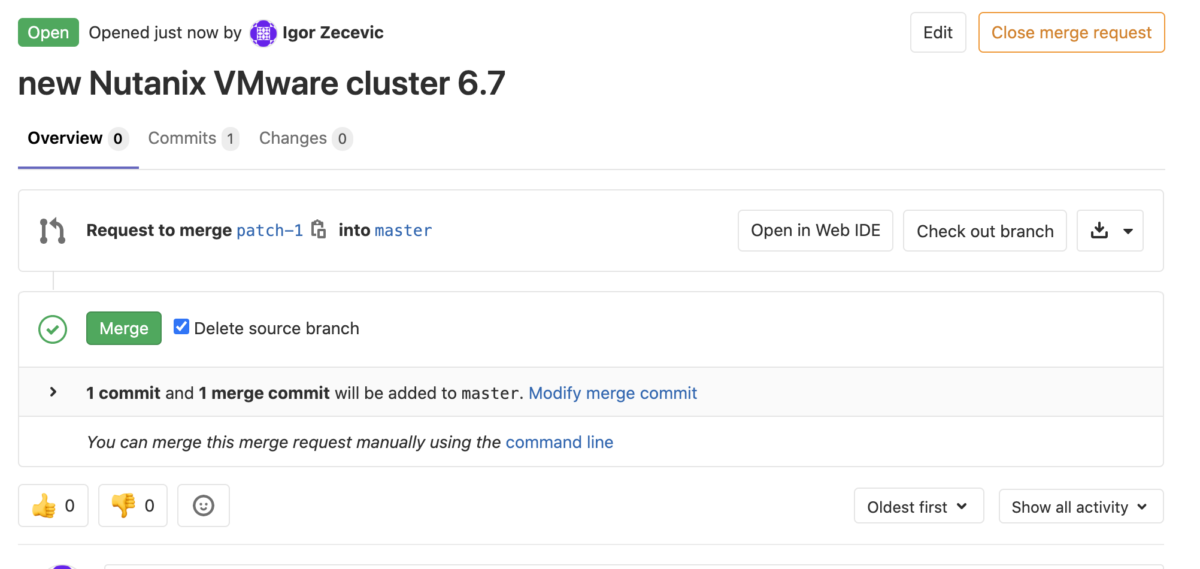
Same process, when the ntnx-cluster-config.json is edited, the operator/admin submits a merge request: New Nutanix VMware Cluster 6.7
 The merge request is accepted, and the pipeline is triggered.
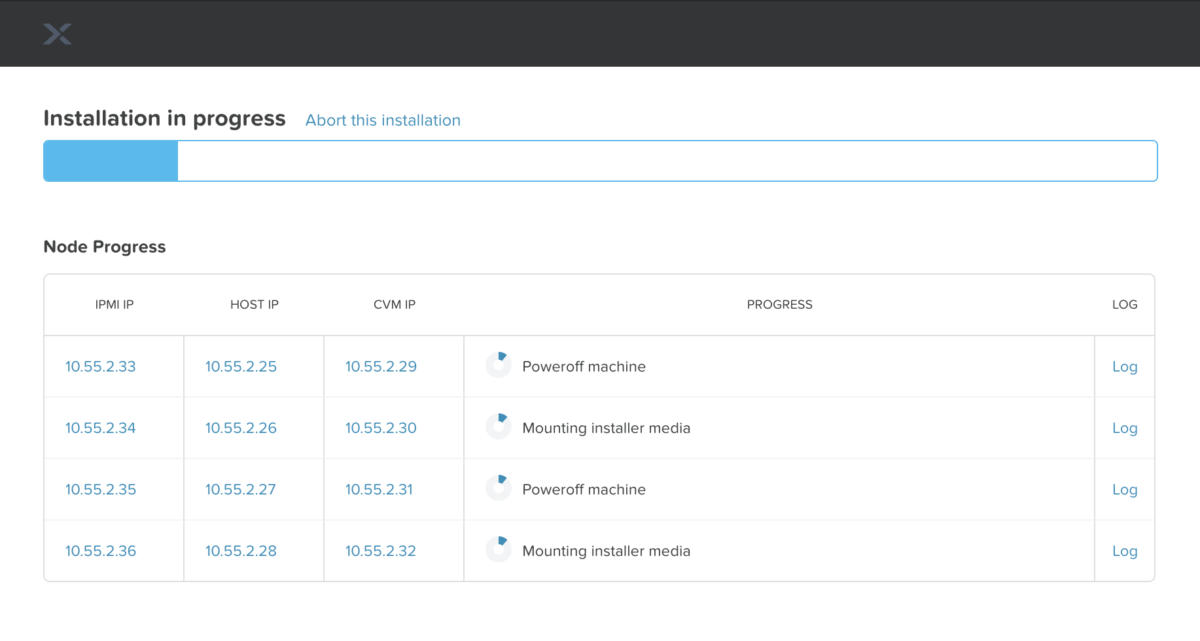
The pipeline has started and has 6 different stages. Currently, the pipeline is running the ntnx-cluster-foundation stage.

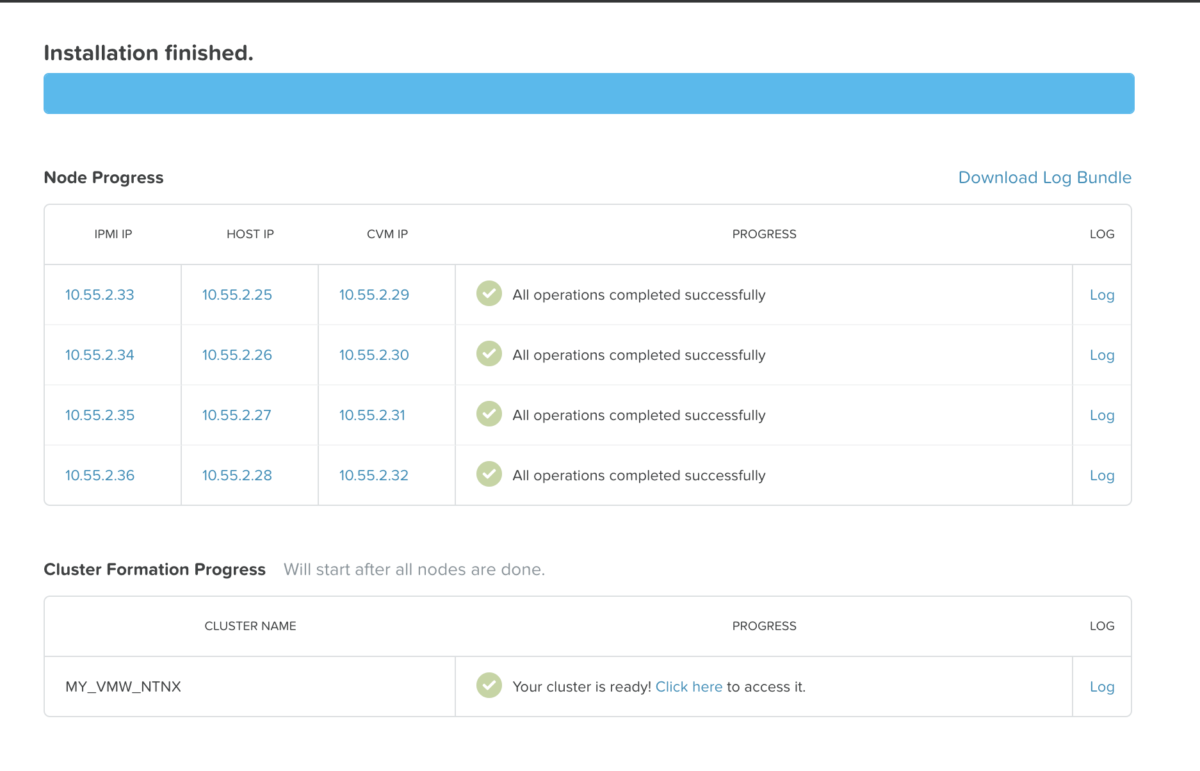
 After 45 minutes, foundation and cluster creation is done.
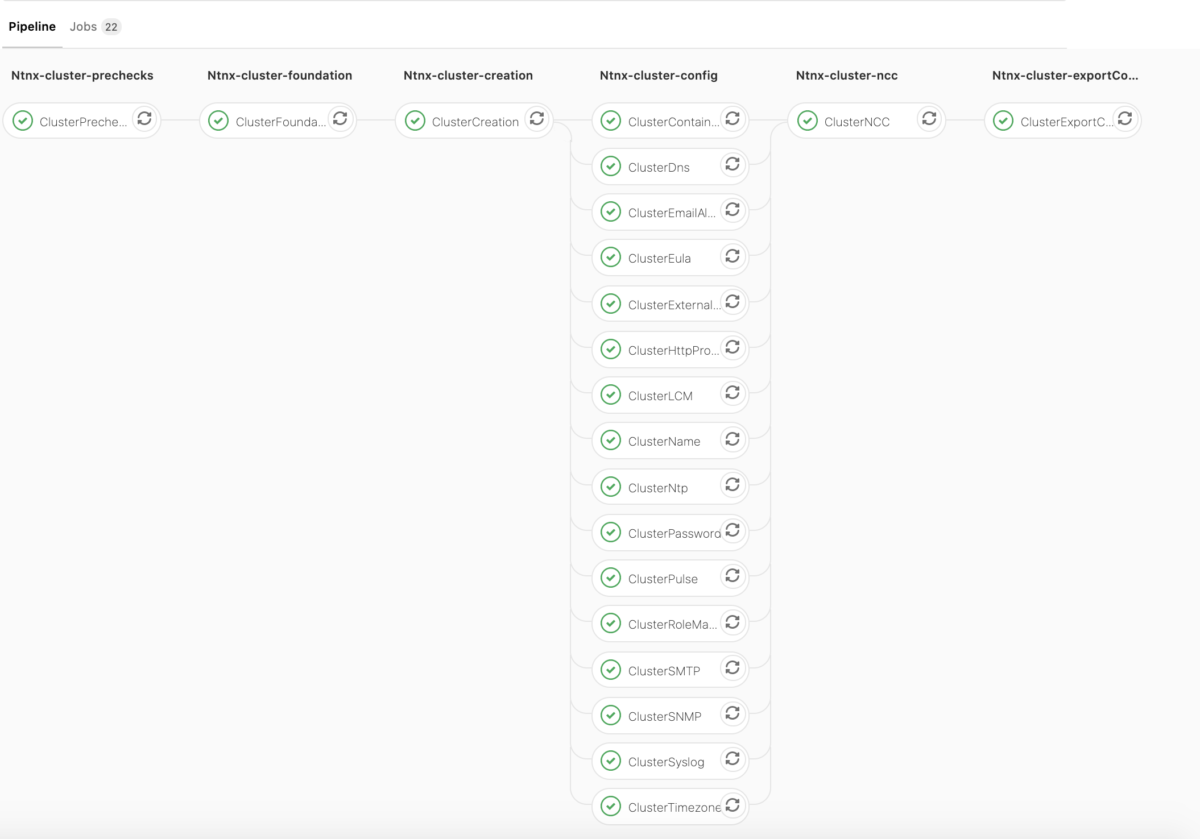
 After completion of the ntnx-cluster-foundation and ntnx-cluster-creation stages, the ntnx-cluster-config stage starts. (sorry I was too lazy to take the screenshot when the pipeline was running the ntnx-cluster-config stage, but you got the point 🙂 ).
By the way, it took 58 minutes, so an hour to image 4x nodes with vSphere, creates and configures the Nutanix cluster. Pretty quick no?

This is our new Nutanix Cluster, named MY_VMW_NTNX, composed of 4 nodes with vSphere 6.7.0
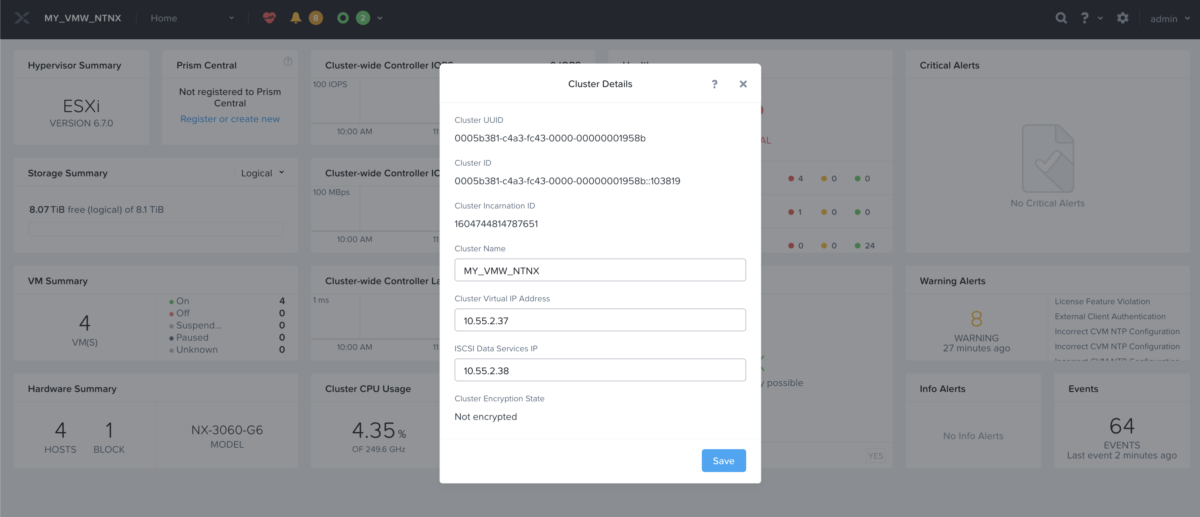
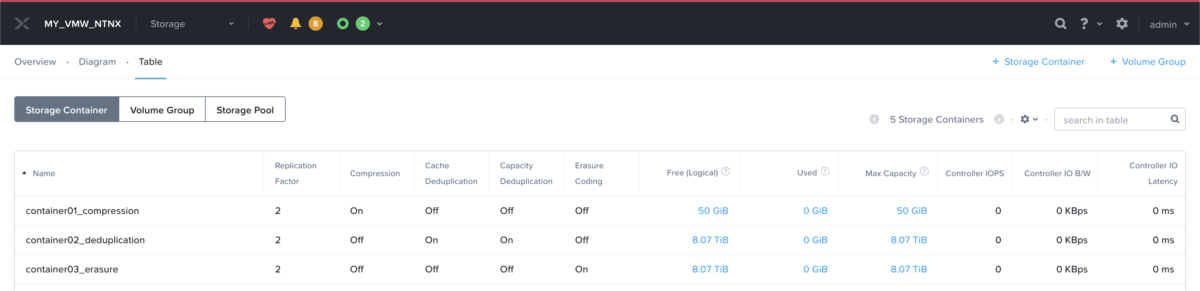
The idea wasn’t to spam you with 500x screenshots, so I just took the storage containers page to show you the creation of the 3x containers we declared in the ntnx-cluster-config.json file (compression, deduplication, erasure_coding). For the remaining settings, you have to believe me 🙂
Enjoy!