Nutanix and Gitlab – Foundation and Cluster Creation
Nutanix has a bunch of APIs that you can leverage to automate different processes and reduce operational time, effort, risks, and improve consistency. In the following example, we will see how GitLab can be used to deploy a new AHV cluster from scratch.
Our Gitlab Project called “ntnx-automation” is composed of different files:
- A README file, usually a documention, describing requirements, how to use the solution, etc.
- A ntnx-scripts folder storing all scripts dedicated to the automation project.
- The “gitlab-ci.yml” which is basically the core/construct of the Gitlab’s Pipeline. It’s basically the structure scheduling each step of the Pipeline.
- Finally, the “ntnx-cluster-config.json” file, where all settings related to our new Nutanix AHV Cluster deployment can be found.

Let’s have a closer look at the ntnx-cluster-config.json file.
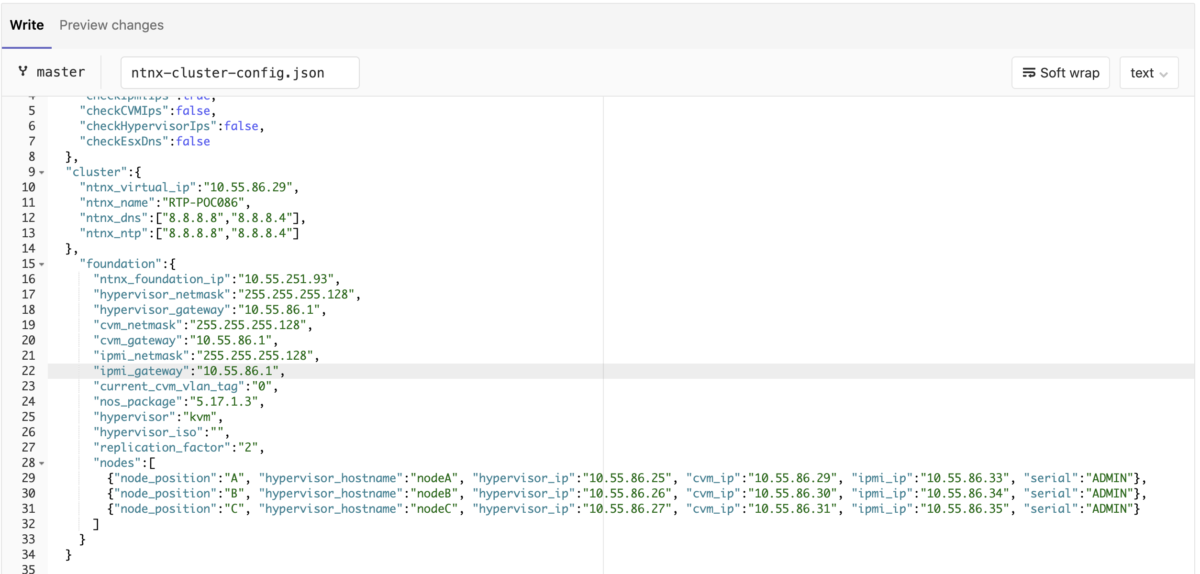
Like I said, you will find in that config file all relevant settings required for the Foundation Process. Essentially all inputs you usually enter manually on the Foundation page are filled here, such as :
- Hypervisors/CVMs/IPMIs IPs
- Hypervisors/CVMs/IPMIs Netmask
- Hypervisors/CVMs/IPMIs Gateway
- AOS version
- AHV version (optionally)
- Hypervisor/CVM VLAN
- Replication factor.
Note that I have also defined the ntnx_foundation_ip used to image the nodes (A/B/C) present in the nodes [] bracket.
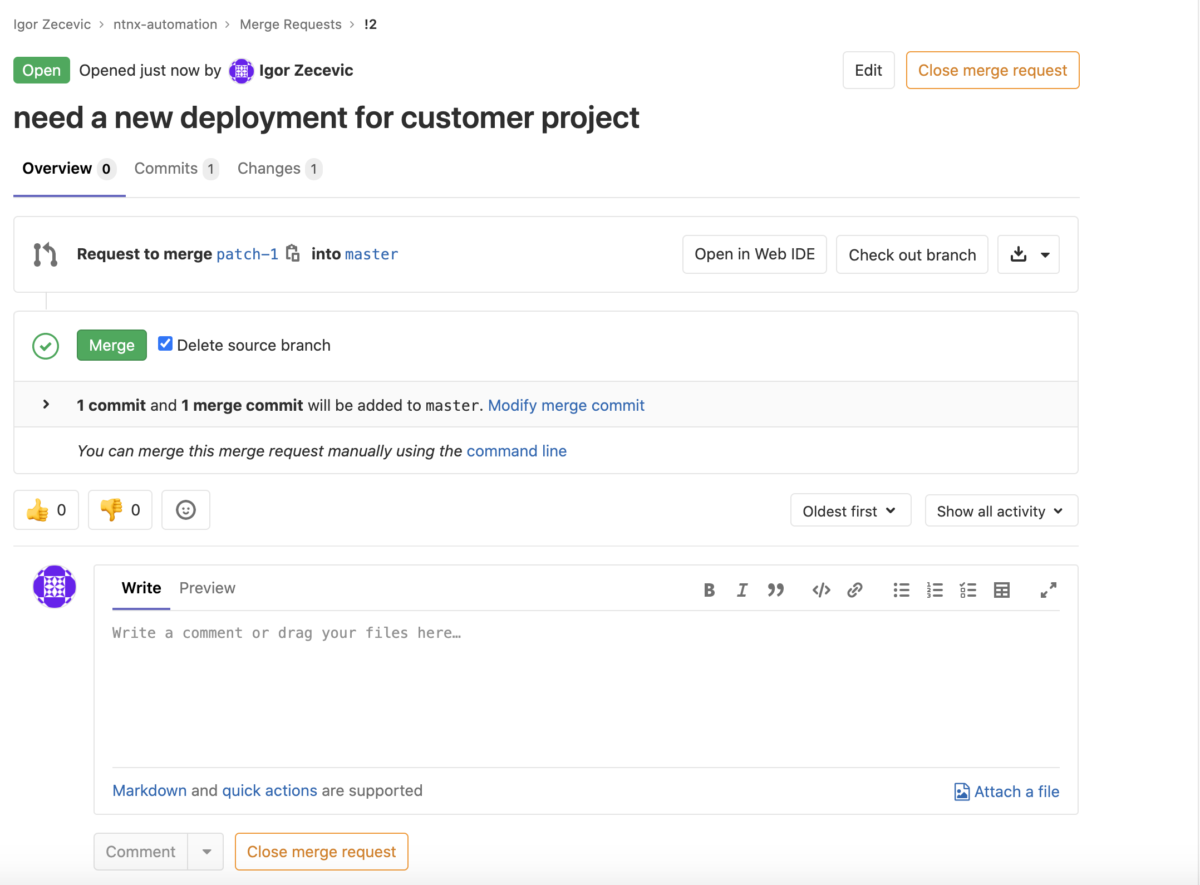
What’s the process to trigger the pipeline?
After having filled out all information in the ntnx-cluster-config.json the operator submits a merge request. Example: “need a new deployment for customer project”

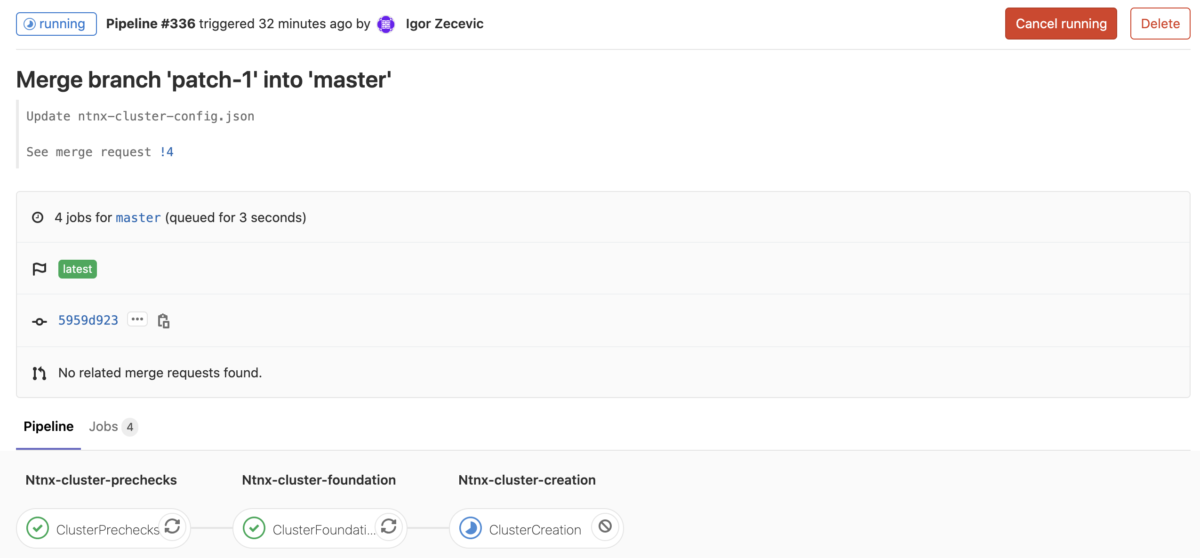
If the merge request is approved, the pipeline is triggered automatically.
The pipeline is running

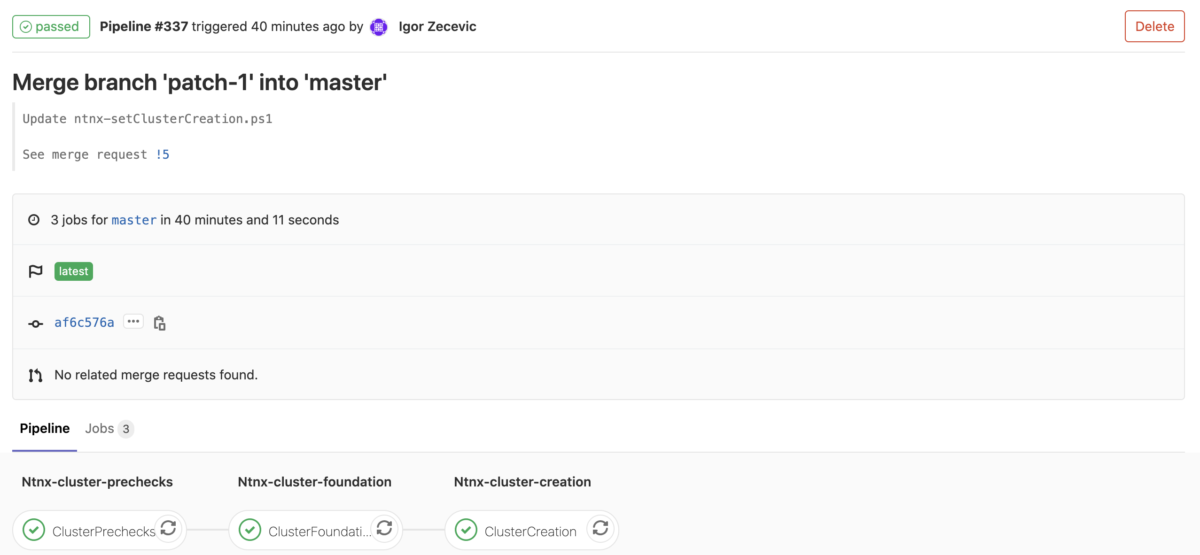
In that example, the pipeline has 3 stages:
ntnx-cluster-precheck
ntnx-cluster-foundation
ntnx-cluster-creation
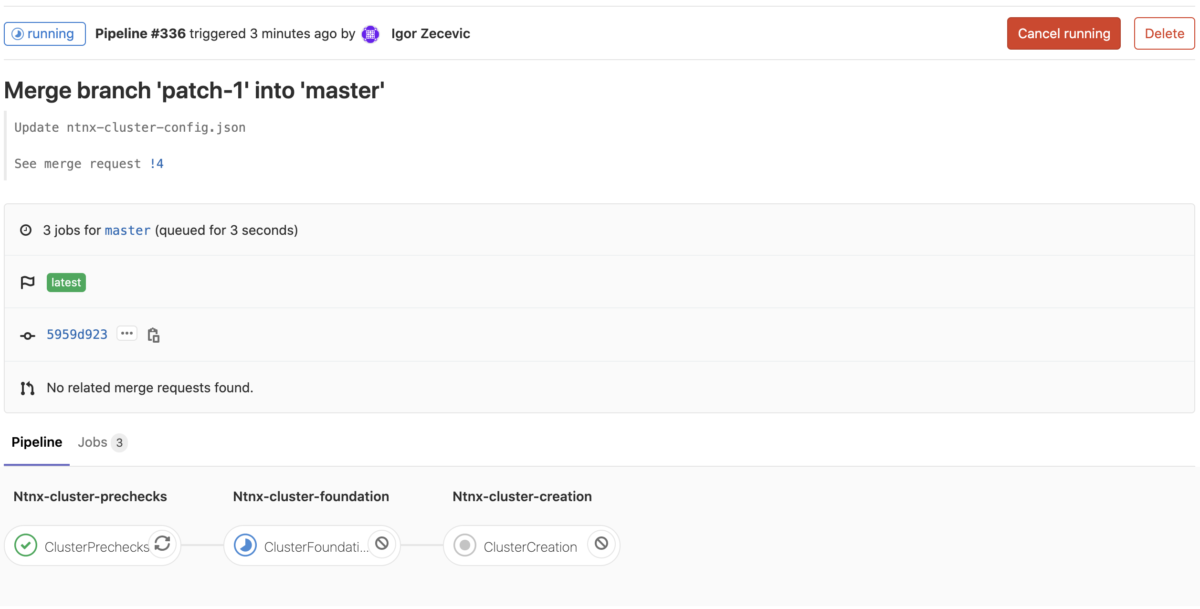
The ntnx-cluster-foundation stage is under running (duration 51 seconds)
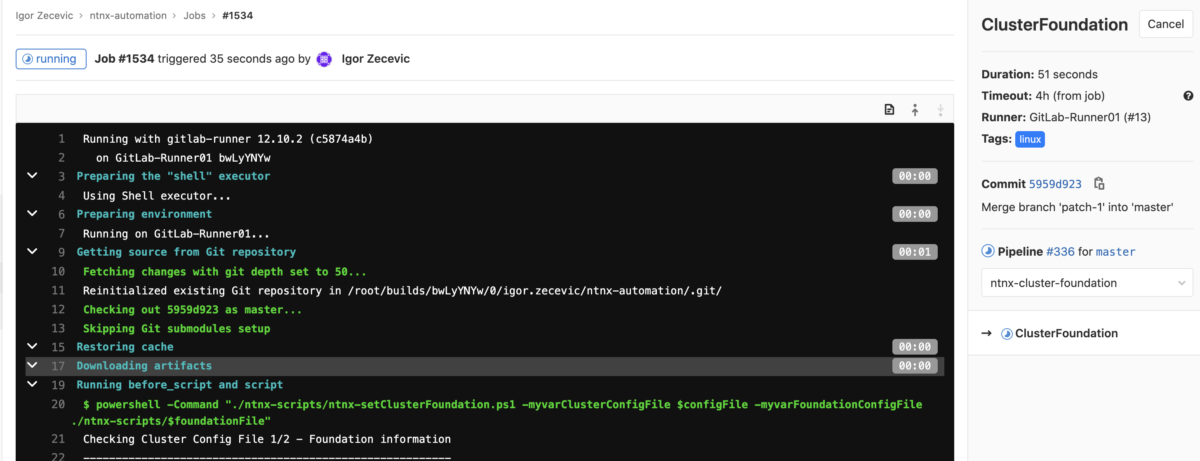
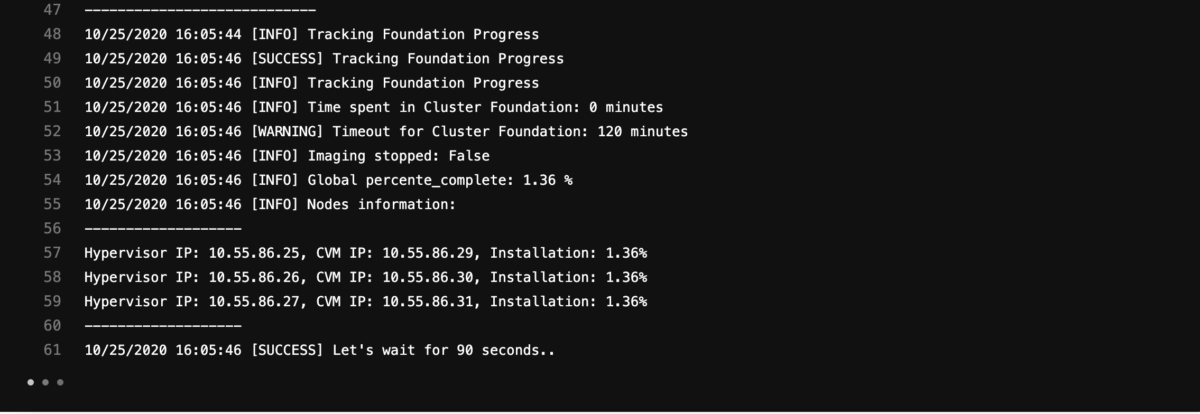
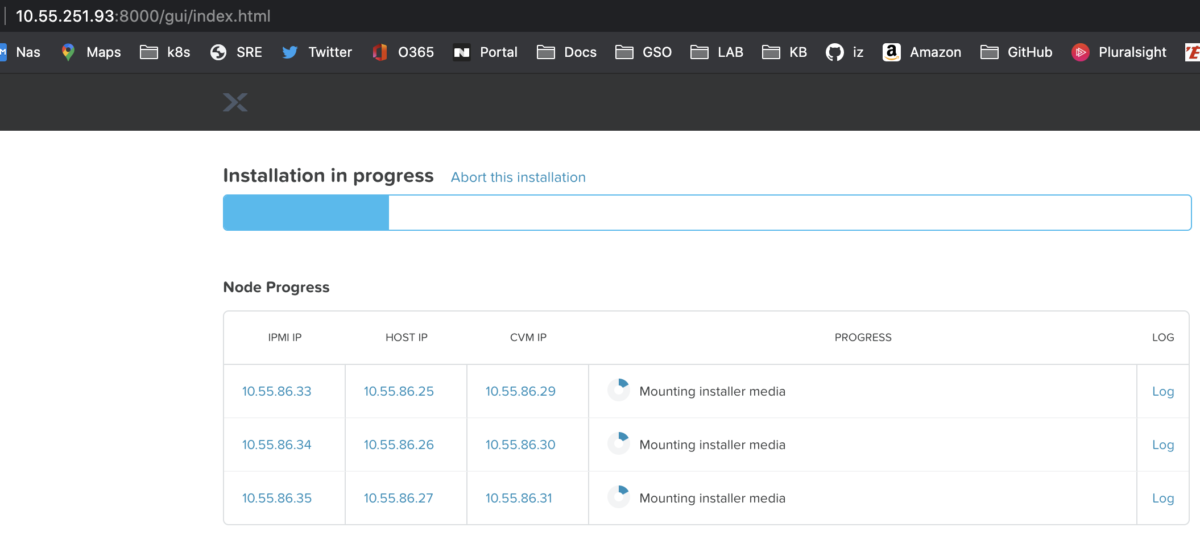
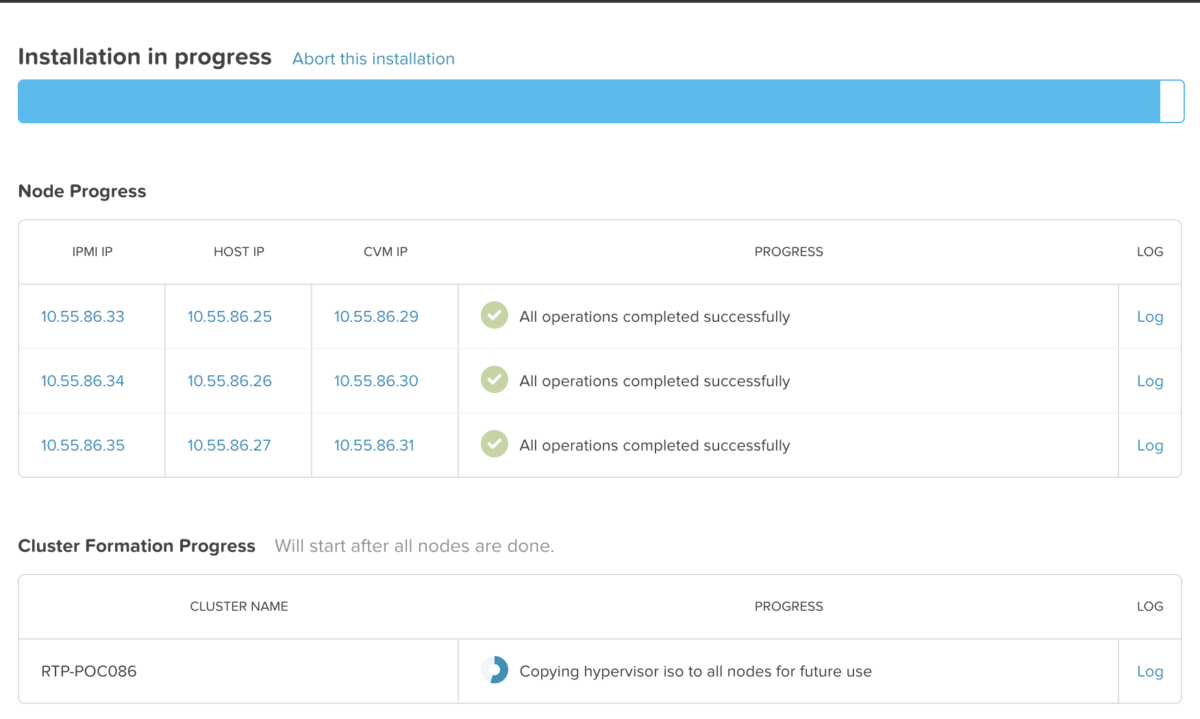
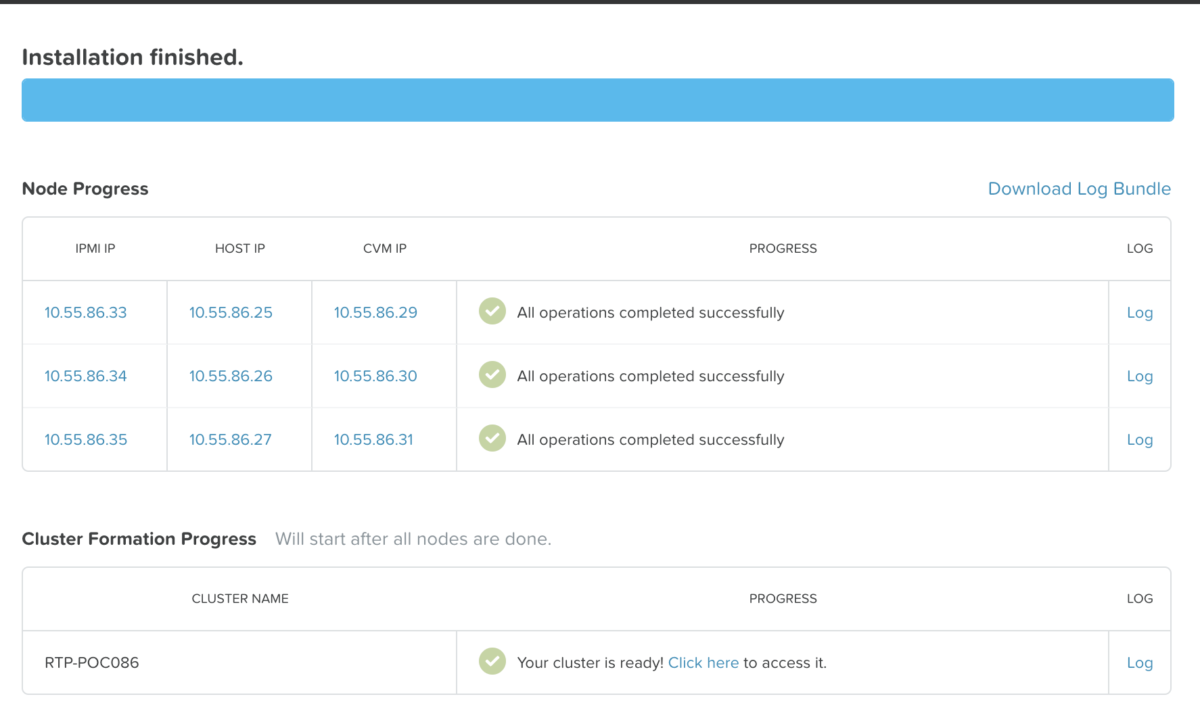
Foundation is effectively running and Foundation, IPMIs, Hypervisors and CVMs IPs match IPs provided in the ntnx-cluster-config.json file.
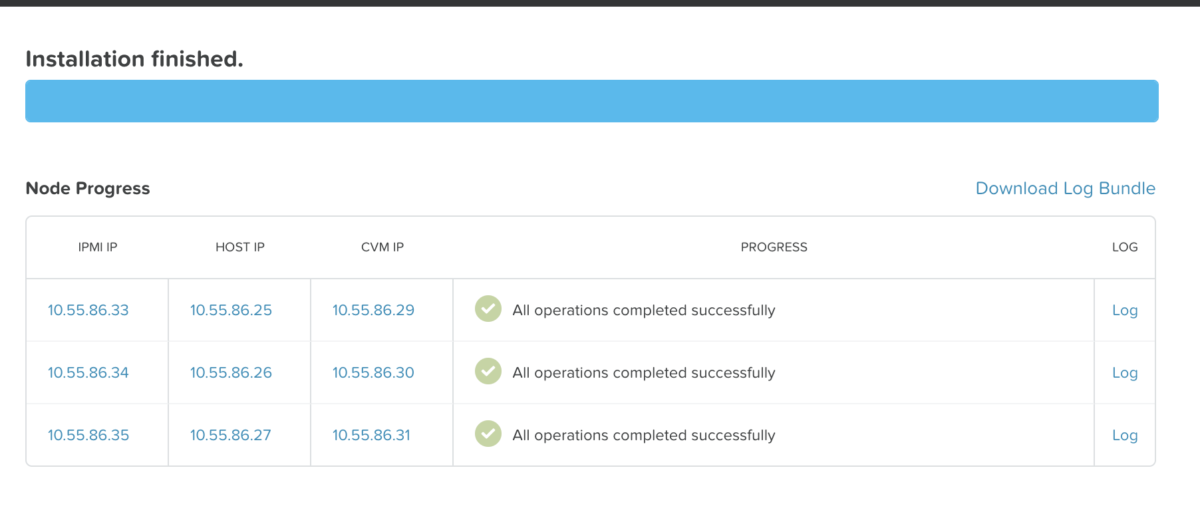
After only 30 minutes, all nodes are imaged successfully.
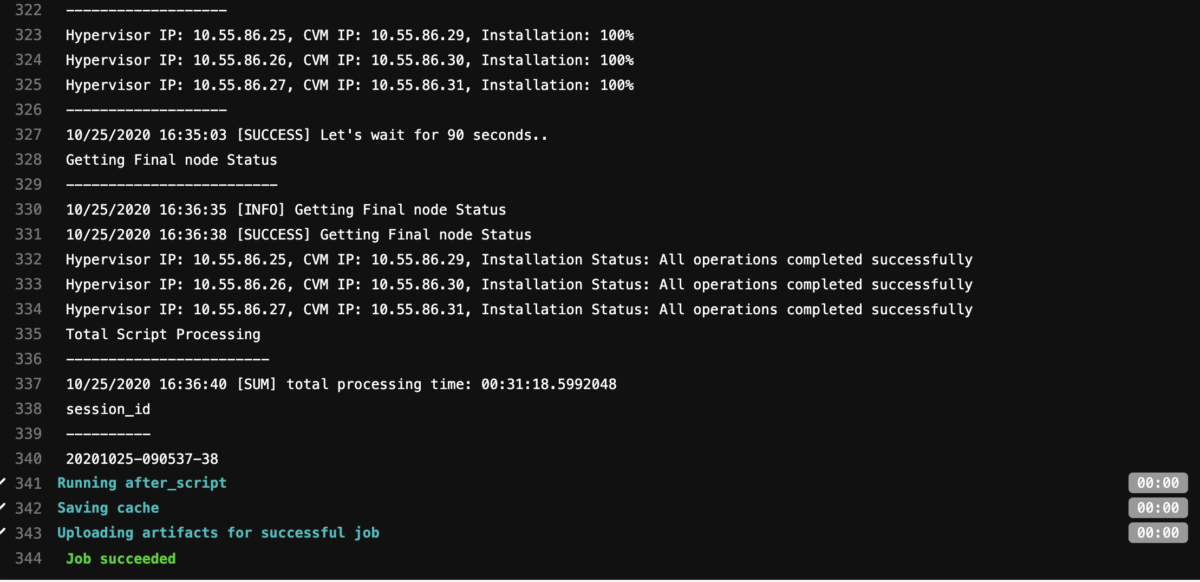
The last stage of the pipeline begins: ntnx-cluster-creation

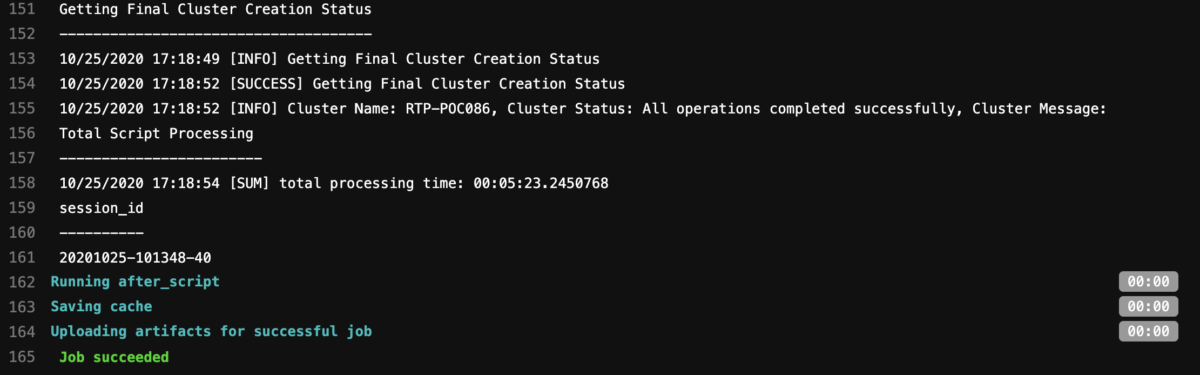
Looks like it took 5 minutes to create the RTP-POC086 cluster
So you can trigger the pipeline, go for a coffee, and within 40 minutes, you have your Nutanix AHV cluster up and ready 🙂

Note that the following example was done with AHV as the hypervisor but works for ESXi too. Please be free to reach out to us if you are interested in this solution.